React Native New Architecture: An Upgrade Checklist for Existing Apps

Your React Native app has been running fine for two years. Then a new release lands, a library you rely on stops updating and your team asks the question nobody wants to answer: how much work is the upgrade going to be?
For apps that already run on the New Architecture, the answer is “not much.” For apps still leaning on the old bridge, it is a real project. The gap between those two situations is what this article is about.
Here is what changed in React Native, what it means for your existing app and a checklist your team can follow, from the first audit to the staged release. It is written for founders and product owners who need to plan the work, and for developers who need a clear order of steps.
Quick takeaways
· The New Architecture is now the only runtime in React Native. It became the sole option in version 0.82 (React Native team, 2026).
· Version 0.84 made Hermes V1 the default JavaScript engine on iOS and Android and turned on precompiled iOS binaries by default.
· Apps already on the New Architecture usually upgrade with few problems. Apps on the legacy bridge face the real work.
· The biggest risk is third-party libraries that still depend on the old bridge.
· Upgrading in small steps, with tests and a staged rollout, costs less than one big jump.

What changed in plain words
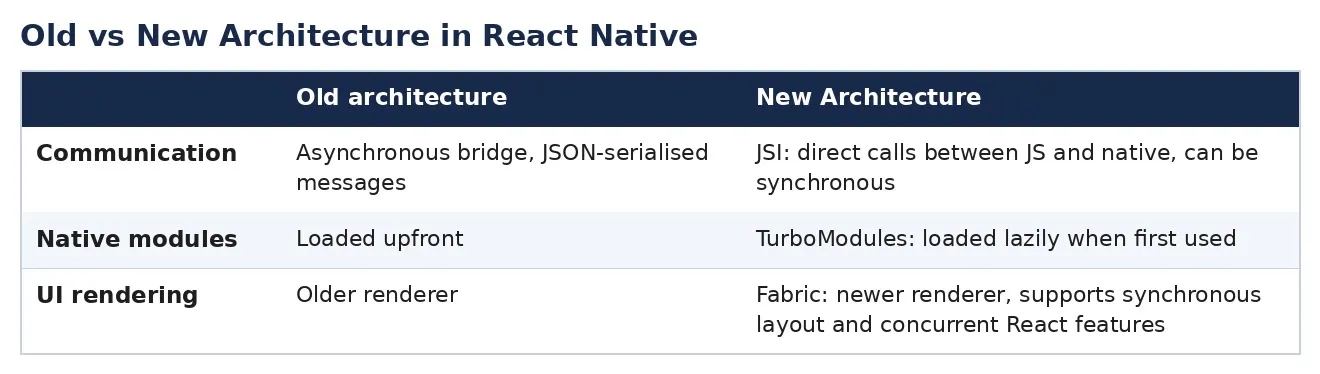
React Native used to talk to the phone through a “bridge,” a messaging layer between JavaScript and native code. The New Architecture replaces that with direct, faster communication between the two sides. It has been the default for new projects for a while, and recent releases finished the job.
Version 0.82 made the New Architecture the only runtime option. Version 0.84, released in February 2026, kept removing legacy code, made Hermes V1 the default engine and switched on precompiled iOS binaries so clean builds no longer compile React Native core from source (React Native team, February 2026). It also requires Node.js 22.11 or later. Later releases have continued the pattern, and version 0.87 arrived in August 2026.
If you want a refresher on how React Native compares with other options, our guide on Flutter vs React Native covers the main trade-offs.

Why this matters for your business
Three reasons make this more than a developer concern.
Support windows. The React Native team supports only the most recent minor versions with fixes. Staying on an old version means no patches, and it makes every later upgrade bigger.
Store rules. Google Play requires new apps and updates to target Android 16 (API level 36) from August 31, 2026, with an extension to November 1, 2026 (Google Play Console Help, 2026). Check that your React Native version supports the API level the store now demands.
Speed and cost. Smaller builds, faster clean builds and better runtime performance help your team ship more often. Skipping the upgrade does not save money. It postpones the bill and makes it larger.
Step 1: Find out where your app stands
Start with a short audit. It should take a developer a day or two.
1. Note your current React Native version and the date of its release.
2. Check whether the app already runs on the New Architecture.
3. List every third-party library and native module you use.
4. Check each library’s support for the New Architecture and for the version you plan to move to.
5. Note any custom native code your team wrote for Android or iOS.
The result is a simple table of what is safe, what needs a replacement and what needs rewriting. That table is your upgrade plan and your estimate.
Step 2: Fix the usual blockers
Teams that have already done this work tend to report the same trouble spots.
· Old-style native modules. Code that reaches native features through legacy calls needs to move to the newer module system.
· Untyped native modules. The New Architecture expects typed interfaces, so loose definitions must be tightened.
· Direct bridge calls and synchronous native calls. These patterns are the most likely to break.
· Unmaintained libraries. If a package has not been updated in a long time and has no replacement, you may need to fork it, swap it or write the feature yourself.
· Storage choices. Some older storage libraries are common sources of trouble, so check yours.
Replacing a library is almost always cheaper than patching an abandoned one. When a package is deeply embedded, plan for more time.
Step 3: Understand what Hermes V1 changes
Hermes is the JavaScript engine that runs your code. Version 0.84 made the newer Hermes V1 the default. Apps already on Hermes need no configuration change, and the release notes describe better execution speed and lower memory use without giving exact figures (React Native team, February 2026).
The catch is that the newer engine is stricter in places. Code, including code inside third-party packages, that relied on loose behavior can break. Run your full test suite on the new engine, and watch for crashes that only appear on certain screens or devices. If you must, the release notes describe how to opt out temporarily, but treat that as a short-term fix.
Step 4: Upgrade in small steps
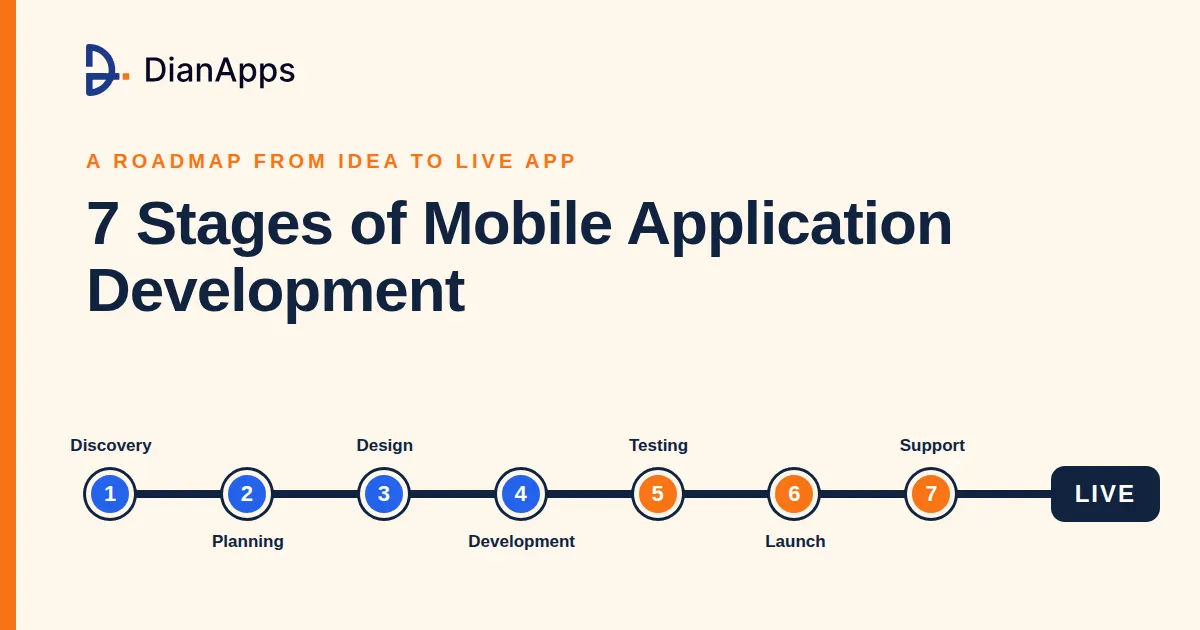
Do not jump four versions at once. Move one minor version at a time, run your tests and fix what breaks before moving on. This makes each problem easier to trace, because only one thing changed.
Get Rishabh Vardhan Sharma’s stories in your inbox
Join Medium for free to get updates from this writer.
A sensible order looks like this:
6. Update Node.js and your tooling.
7. Upgrade React Native to the next version.
8. Update the libraries that depend on it.
9. Build and run the app on both platforms.
10. Run automated and manual tests.
11. Repeat until you reach your target.
Many teams also stay one minor version behind the newest release. That gives the ecosystem time to catch up while still getting recent fixes.
Step 5: Test where it hurts
Upgrades break things in boring places. Focus your testing on:
· Startup time and the first screen.
· Navigation, forms and anything with animations.
· Features that call native code: camera, location, notifications, payments.
· Background tasks and push notifications.
· Low-memory and older devices, especially on Android.
Compare crash rates and performance before and after. If you have a device lab or a cloud testing service, run the same journeys across several phones and operating system versions.
Step 6: Release in stages
Even a well-tested upgrade can surprise you in production. Release to a small share of users first, watch crash and error reports and widen only when the numbers look healthy. Keep a plan ready to ship a quick fix. Good crash reporting by device, version and country shortens your response time.

How long and how much?
The honest answer depends on your starting point. An app already on the New Architecture, with maintained libraries, can often upgrade in days. An app with heavy custom native code and several abandoned libraries can take weeks. The audit in step one is what turns a guess into an estimate.
If your team is small or busy, an experienced react native development agency can do the audit and the upgrade while your developers keep shipping features. Our guide on IT staff augmentation explains how to add remote engineers for work like this, and our post on hiring a React Native developer on a contract covers what to check before you sign.
Common mistakes to avoid
· Upgrading everything on a Friday. Leave room to fix problems.
· Skipping the library audit. Most surprises come from packages, not from your own code.
· Testing only on a new phone. Older and low-memory devices show the problems first.
· Ignoring the Node and tooling update. A mismatch wastes hours that look like app bugs.
· Treating the upgrade as a one-off. Plan a regular upgrade rhythm, such as once or twice a year, so each step stays small.
A short, repeated upgrade habit is cheaper than a long, painful catch-up. Teams that schedule it like any other maintenance task rarely face an emergency, because they never fall far behind. It also keeps your developers current with the tools they use every day, which helps hiring and keeps the codebase easier to understand.
Questions to ask a partner about upgrades
When you talk to a react native app development company or a react native app development agency, ask:
12. How many New Architecture migrations have you completed, and can I see an example?
13. How do you audit third-party libraries before you quote?
14. How do you test the upgrade, and on which devices?
15. How do you handle a library that is no longer maintained?
16. What does your release plan look like after the upgrade?
Clear, specific answers show real experience. A vague “we handle upgrades all the time” does not.
Final thoughts
The New Architecture is no longer an experiment. It is how React Native works now. For apps that are ready, the upgrade is routine. For apps that are not, it is a project worth planning. Audit first, fix the blockers, upgrade in small steps, test the risky areas and release in stages.
If you need help, DianApps offers React Native development services for new builds, upgrades and long-term support. As a react native development company with teams in the USA, Canada, Australia, UAE and India, it provides react native application development services for startups and established brands. Whether you hire a react native mobile app development company or a smaller react native app development agency, ask for the same audit-first approach, and choose a dedicated team or milestone basis that fits your plans.