How to write to registers (RKS) over I²C on Arduino
sending data to an I²C device (EEPROM, sensor, RTC, etc.) from an Arduino. If you meant something else by “RKS”, tell me and I’ll adapt, but this will cover 90% of I²C “how do I write” cases.
1. I²C basics on Arduino
On Arduino you usually use the Wire library.
Get Ampheo’s stories in your inbox
Join Medium for free to get updates from this writer.
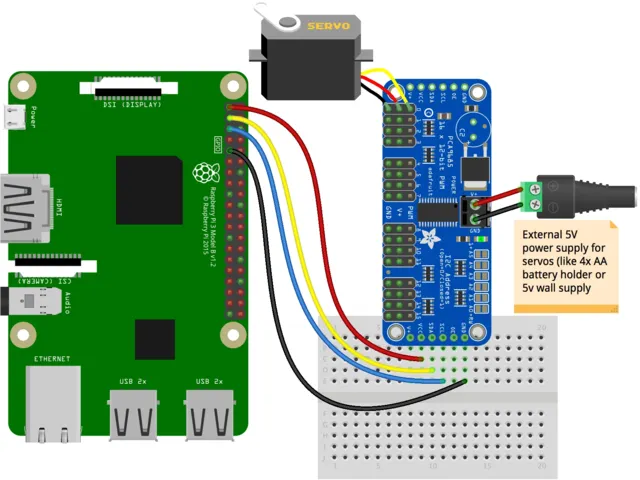
Common I²C pins:
- Arduino Uno / Nano:
- SDA → A4
- SCL → A5
- Mega:
- SDA → 20
- SCL → 21
Every I²C device has:
- A 7-bit I²C address (e.g.
0x68,0x50,0x27…). - One or more registers / memory locations inside it (what you called “RKS”).
- A datasheet that says:
- which register address does what
- how many bytes to write
2. Minimal pattern: write to an I²C register
General pattern with Wire:
#include <Wire.h>
#define DEVICE_ADDR 0x68 // Example: change to your device address
#define REG_ADDR 0x00 // Example register you want to write
void setup() {
Wire.begin(); // Join I2C bus as master
Serial.begin(9600);
// Write 1 byte (0x12) to register 0x00 of device at 0x68
Wire.beginTransmission(DEVICE_ADDR);
Wire.write(REG_ADDR); // Register address
Wire.write(0x12); // Data byte to write
uint8_t error = Wire.endTransmission(); // Sends STOP
if (error == 0) {
Serial.println("Write OK");
} else {
Serial.print("I2C error: ");
Serial.println(error);
}
}
void loop() {
// nothing here for now
}Explanation:
Wire.beginTransmission(DEVICE_ADDR);
→ Start I²C conversation with that device.Wire.write(REG_ADDR);
→ Tell the device which internal register (RKS) you want to access.Wire.write(data);
→ Send the data byte(s) to that register.Wire.endTransmission();
→ Actually sends everything on the bus and finishes.
If your device needs multiple bytes, you just keep calling Wire.write() before endTransmission().
3. Example: writing to an I²C EEPROM (e.g. 24LC256)
Many tutorials use a 24LC256/24LC512 I²C EEPROM. Writing looks like this:
#include <Wire.h>
#define EEPROM_ADDR 0x50 // 24LC256 base address with A0/A1/A2 = GND
void eepromWriteWord(uint16_t memAddr, uint8_t value) {
Wire.beginTransmission(EEPROM_ADDR);
// High + low address bytes (because EEPROM has many addresses)
Wire.write((uint8_t)(memAddr >> 8)); // high byte
Wire.write((uint8_t)(memAddr & 0xFF)); // low byte
Wire.write(value); // data byte
Wire.endTransmission();
delay(5); // wait for EEPROM write cycle (t_WR)
}
void setup() {
Wire.begin();
Serial.begin(9600);
// Write 0x3A at address 0x0010
eepromWriteWord(0x0010, 0x3A);
Serial.println("EEPROM write done");
}
void loop() {}Here the “RKS” are the EEPROM memory addresses (memAddr).
4. Example: writing to a sensor/RTC register
Say you have an RTC or sensor with register 0x01 that controls mode:
#include <Wire.h>
#define SENSOR_ADDR 0x68 // example
void writeReg(uint8_t reg, uint8_t value) {
Wire.beginTransmission(SENSOR_ADDR);
Wire.write(reg); // register address inside the chip
Wire.write(value); // value to write
Wire.endTransmission();
}
void setup() {
Wire.begin();
Serial.begin(9600);
// For example: set config register 0x01 to 0b10000011
writeReg(0x01, 0b10000011);
Serial.println("Register written");
}
void loop() {}5. Reading back the register (often needed)
Typical pattern to read what you wrote:
uint8_t readReg(uint8_t reg) {
Wire.beginTransmission(DEVICE_ADDR);
Wire.write(reg); // which register to read
Wire.endTransmission(false); // send a RESTART, no STOP
Wire.requestFrom(DEVICE_ADDR, (uint8_t)1); // ask for 1 byte
if (Wire.available()) {
return Wire.read();
}
return 0; // or some error value
}You’d use it like:
uint8_t value = readReg(0x01);
Serial.print("Reg 0x01 = 0x");
Serial.println(value, HEX);6. Checklist if it doesn’t work
- Make sure:
- SDA/SCL pins are correct for your Arduino.
- Device has power and GND connected to Arduino GND.
- You’re using the correct I²C address from the datasheet.
- You write the correct register address and number of bytes.
- Use an I²C scanner sketch (lots of examples online) to see if Arduino can “see” the device address at all.